
If you are a customer looking to implement or using Microsoft Dynamics AX 2012 R3 and use major aspects of Workforce management under the Human Resources Management, there are some Out-Of-The-Box workflows under HRM module that you can leverage to complete/automate several key processes such as Hire a worker, Transfer a Worker, Terminate a worker etc. You could use these new workflows build the complete on-boarding process for the new hires into the workflow.
In this post, I will explain a little bit about these workflows and how you can use them in AX 2012 R3.
Note: You will need to activate the Personnel Actions Configuration Key for HRM, to enable these new functionalities in the system.
Workflow For Actions on Hiring a New Worker:
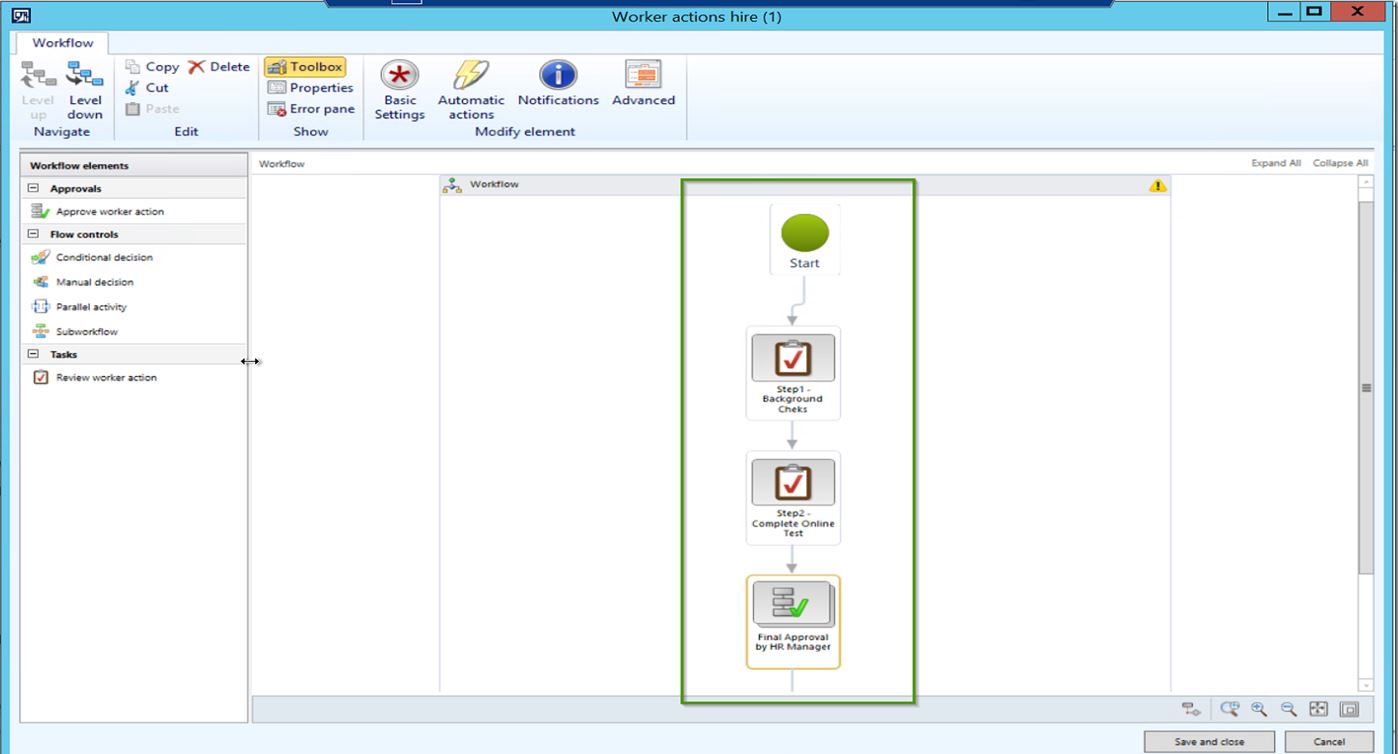
For this demonstration, Let us say there are 3 steps in completing the on-boarding process for a worker before their hiring process can be completed in AX and a worker record can be created.
Step1 : Complete background checks and fill Form A and attach filled in Form.
Step2: Complete online test for on-boarding for the new hire and attach test results.
Step3: Final Approval and worker creation in AX.
-
The screenshot below shows the workflow setup which has 3 distinct steps for performing several tasks related to new hire’s onboarding before the worker record can be created in AX. The final step of the workflow is the approval of the worker record after all the prior tasks are completed by respective team members.
-
The workflow is setup and is activates now in the system. The next step is to configure the Personnel Action type. You can configure as many personnel action as you want/need and associate each action type with a personnel action and then link it to the workflow it should follow. In our example, I have created a simple action called Hire New Worker and linked it to the workflow we created above. Screenshot below shows the Personnel Action Type.

- Let us begin the hiring process from All Worker Actions list page. Navigate to HRM > Common > Actions > All Worker Actions.
- Click New Action button and select Hire New Worker as the Personnel Action Type and click Create Action.

-
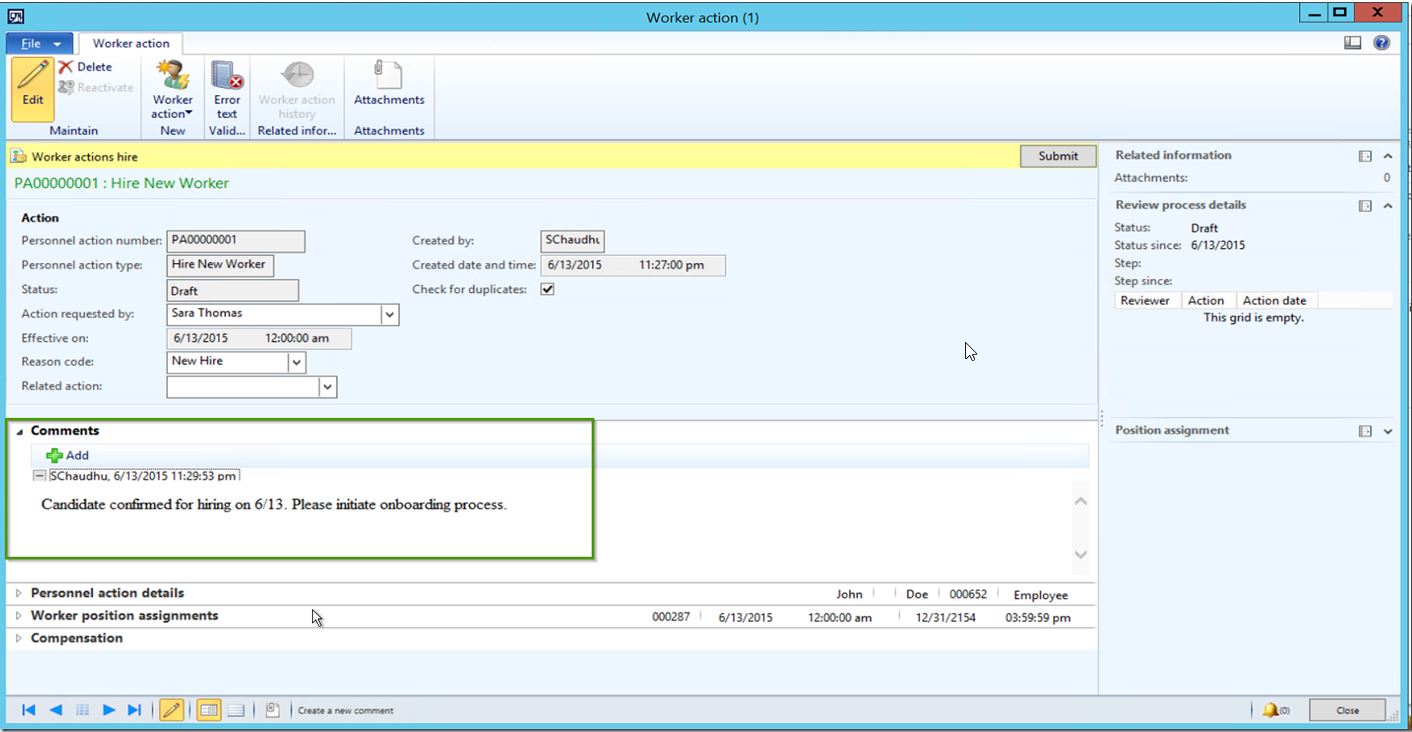
On the next screen, you will notice all the required fields you will need to enter to submit the Hire New Worker action request to the workflow. Select various data fields such as Action Requested by, Worker’s name details, entity in which he is employed, Worker type, employment start date, Position assignment details etc. under the corresponding fast tabs.

- You can also enter additional comments for the reviewers in the workflow about the new hire under the Comments fast tab.
NOTE: You can customize this form to automate the setup of several other data attributes for the workers such as financial dimensions, addresses, contact information and any other key data fields on the worker record, so that those can be embedded into the workflow of onboarding and upon completion, the values will be setup already on the worker record.
-
When you are ready to submit, click Submit button. This will get the worker action into the Hiring Workflow and will be routed to required teams for processing. The standard AX workflow engine can also be used to send the email notification within required instructions for completing the steps of on-boarding.
-
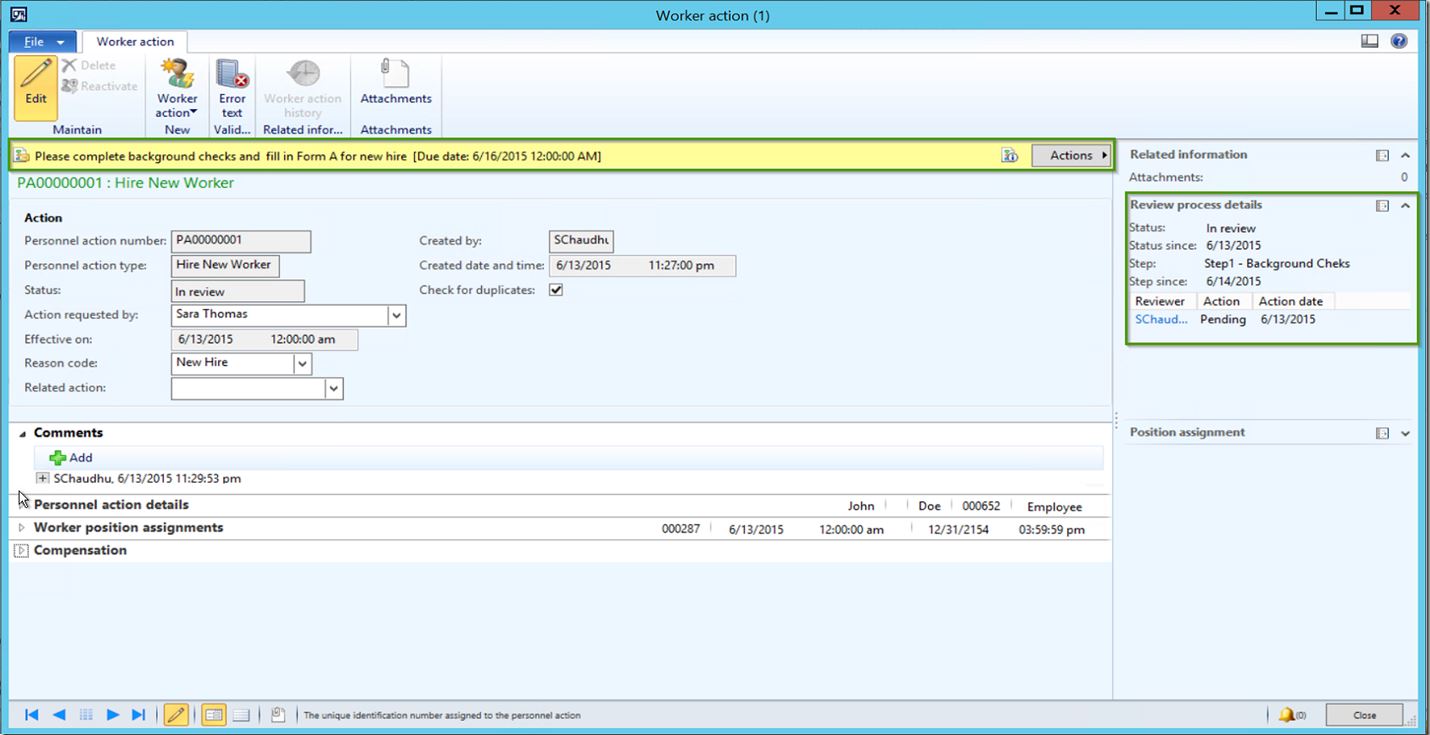
When it is submitted, it will get assigned to the person responsible for Step 1 of on-boarding. They can then review the checklist for the Step 1 and take required actions and mark the Step 1 as complete. If they wish to request a change of data information from the submitter, then can chose that option as well in the workflow. Screenshot below shows the workflow is now assigned to the person responsible for Step 1.
-
They can review the checklist for the step 1 under the workflow step instruction section. Once the person complete the Step1, they will click Actions > Complete.

-
As soon as Step1 is marked as Completed, the workflow is now assigned to person responsible for Step 2. The Review process details fact box on the right shows the current step the process is in. Person responsible for Step 2 will then complete the online test and then will attach test results to the action record and mark the step as Complete.

-
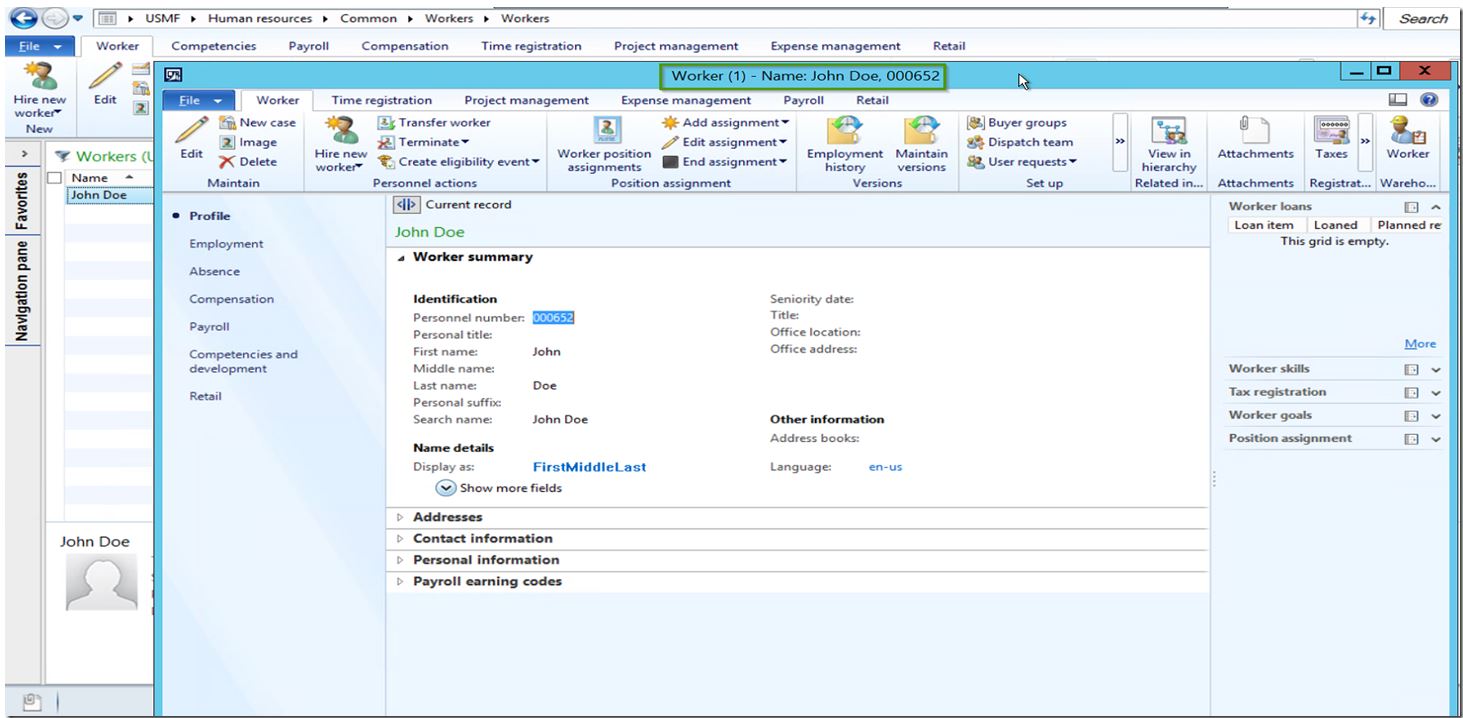
At this point, the workflow gets assigned to the final reviewer of information, who is the HR Manager. He can review all the details on the worker hire action and Approve the New hire action. Upon successful approval, a Worker record will be created automatically in the Worker master under HRM > All Workers.

-
Once the Action is completed, you can see an overview of all the worker actions on All workers list page.

-
Now navigate to the All Workers form under HRM and Verify that the Worker record for John Doe will be created with all the details that were entered on the hire action.
Workflow For Actions on Transferring a Worker & Terminating a Worker: Just like we created the workflow for the Worker Hire action, you can also leverage the transfer and termination workflows and configure all your required steps and continue to use the Transfer and Terminate worker actions.
Hope this quick information was helpful !! Till next time…..
– Sandeep